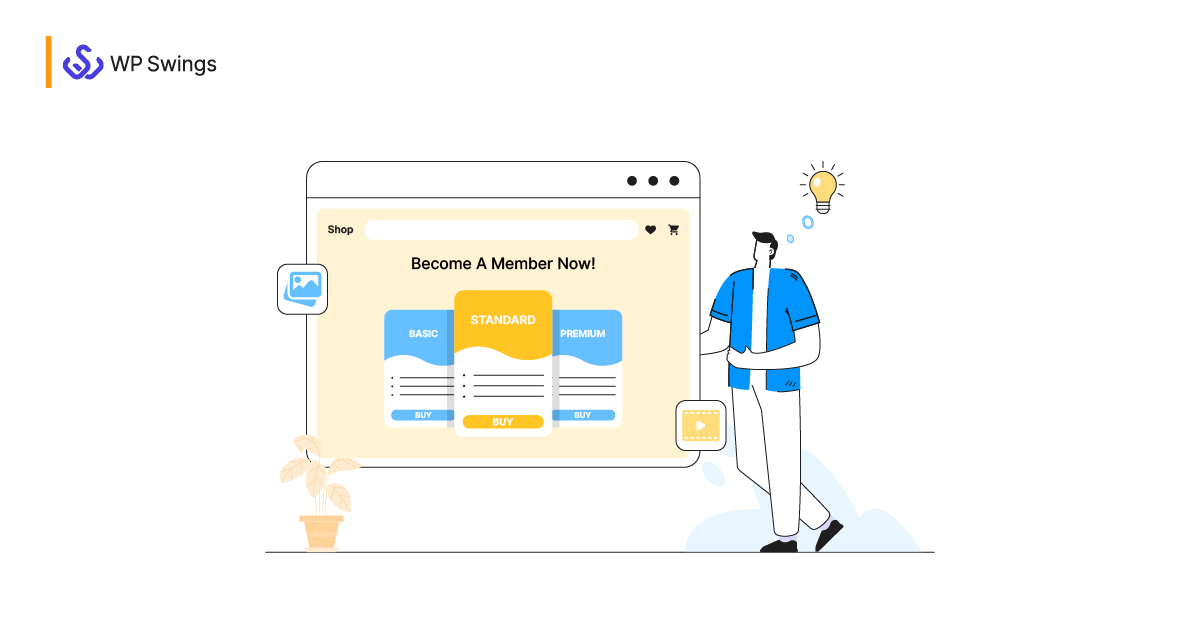
Shopping cart is an entity from which the store conversion starts. It contains the products that buyers are sincere about purchasing, and therefore as a seller, you too need to be careful enough to make your shopping cart prominent and easily accessible.
In those cases when customers purchase multiple products, accessibility of the cart becomes a serious problem. Customers have to leave the shopping page or product page multiple times to check the so-far added product and total pricing in the cart page, and return again for shopping. That breaks the shopping flow and builds frustration.
Here’s a solution — WooCommerce Floating Cart Popup.
This is a powerful tool or plugin that can make your shopping cart easily accessible directly on any desired page of your WooCommerce store, without really making your buyers jump to the cart page. We will look in detail on what it is, and how to set up a WooCommerce floating cart in your store. But, one thing cool, that with floating carts, a lot of unnecessary clicks and page-jump is reduced.
In this article, I will guide you through the step-by-step process to add a WooCommerce floating cart to your store and reduce the pain-point of the buyers that we discussed above.
Jump To Section
- What is a Floating Cart?
- How to add a Floating Cart in your WooCommerce Store?
- Benefits of Adding Floating Cart
What is a Floating Cart?
Floating cart popup is a quick panel that appears when a buyer clicks on the cart icon. It is referred to as a floating cart, because the icon stays at the same place with the scroll of the page, and when clicked, it shows the various details of the cart.
Further, the popup allows you to remove added cart items, change the quantity, check the total price and shipping charges, and other things. Here is WooCommerce Floating cart popup in action:
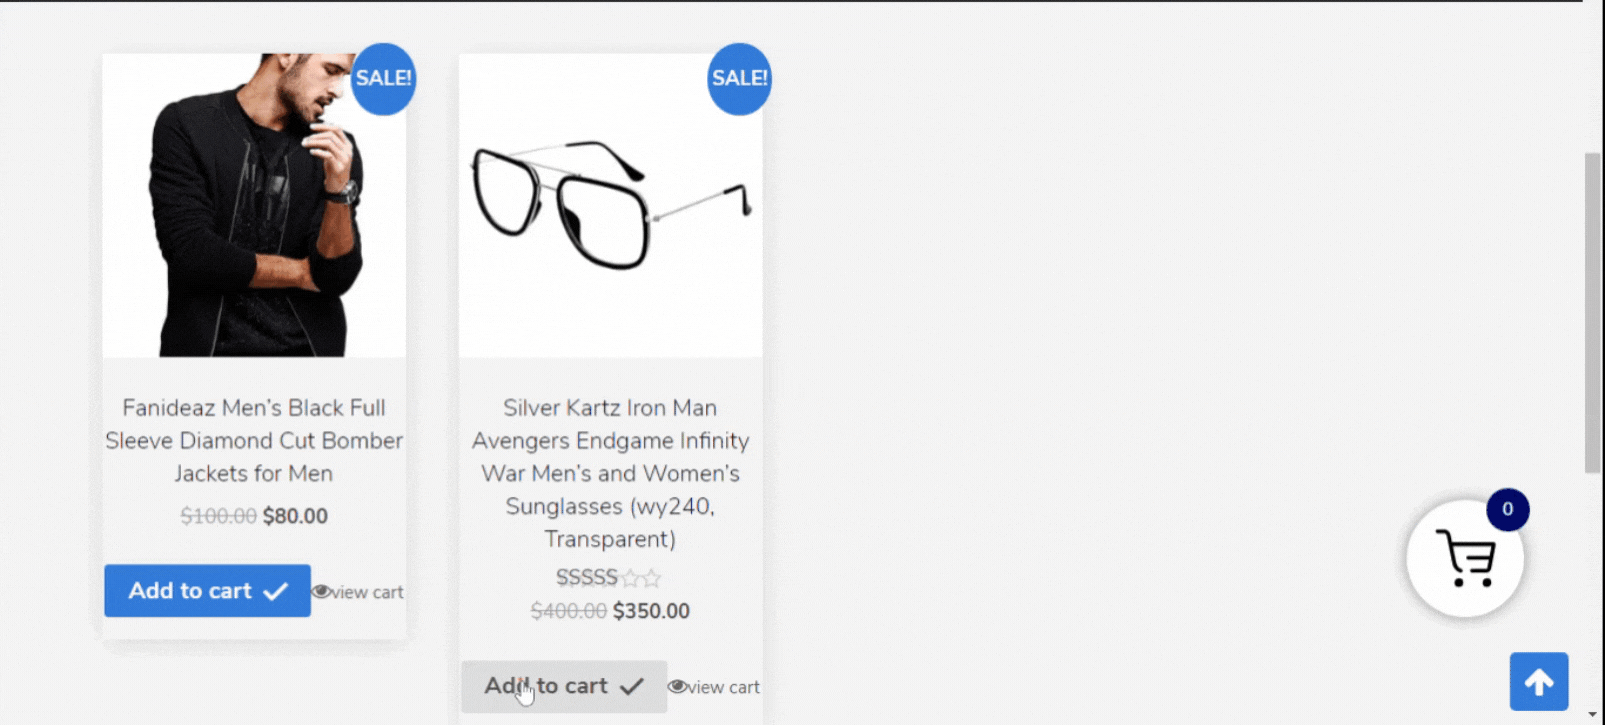
This simple popup can improve customer experience, increase conversion rate, avoid cart abandonment possibilities, and other benefits that we will be discussing in the benefits section below.
Get WooCommerce Floating Cart Popup Plugin
Activate and set up this plugin on your WooCommerce store and convert your shoppers more and better.
Let us now learn the step-by-step process to add a floating cart on your WooCommerce store.
How to Add a Floating Cart in Your WooCommerce Store?
Adding a floating cart on the desired pages of your WooCommerce Store is easy. After you get the plugin, it will not take more than 5 minutes to completely set the plugin and see the floating cart in action. The steps are as follows:
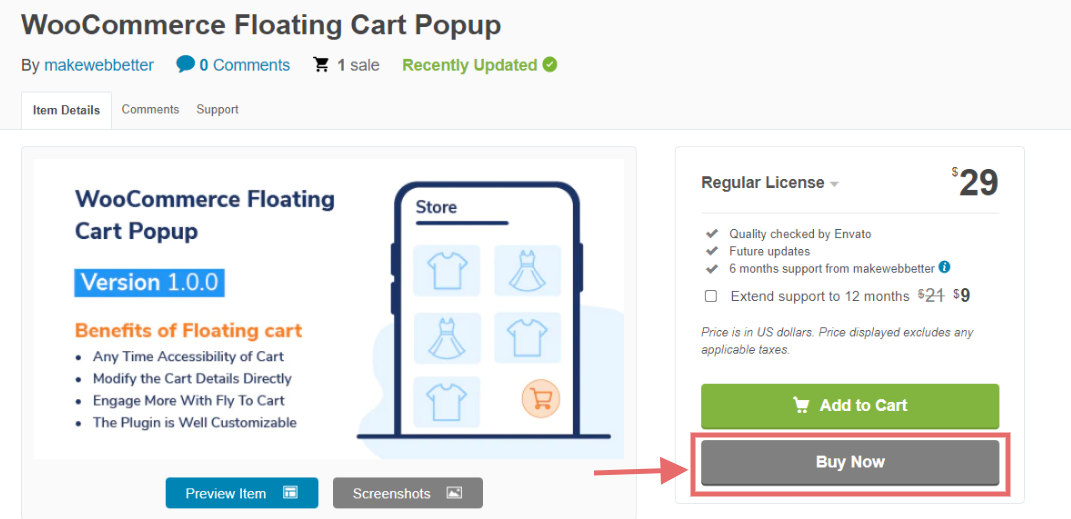
Step 1. Purchase the Plugin From CodeCanyon
You can get the plugin “WooCommerce Floating Cart Popup” from the CodeCanyon store. All you have to do is visit the product page, click on the “Buy Now” button, and follow the secure checkout process.
If you are new to CodeCanyon, sign up and create an account to get all exciting products on CodeCanyon.
After successful checkout, the plugin .zip file will be sent to the verified email address, with the set of other details for license verification.
Now, you have got the plugin. It’s time to install and activate it.
Step 2. Install and Activate the Plugin on WordPress
Here are the steps:
-
Upload and Install the Plugin
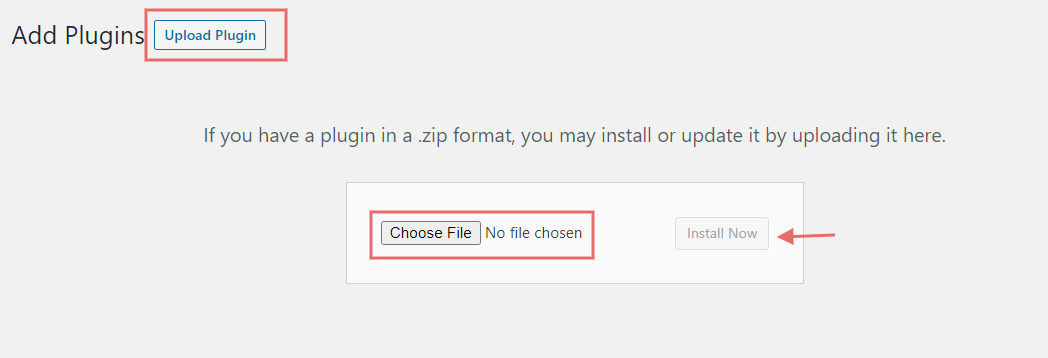
From the WordPress Admin panel, click on Plugin → Add New

After you click on “Add New“, you will get an option of “Upload Plugin“. Upload the .zip file of the plugin that you received after purchasing it from CodeCanyon. And, click on the “Install Now” button.

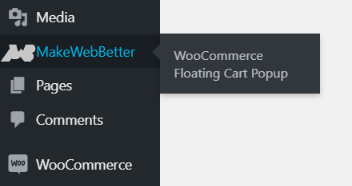
As you install and activate the plugin. A new menu for floating carts will be added in the vertical menu bar under the “MakeWebBetter” as shown below.

-
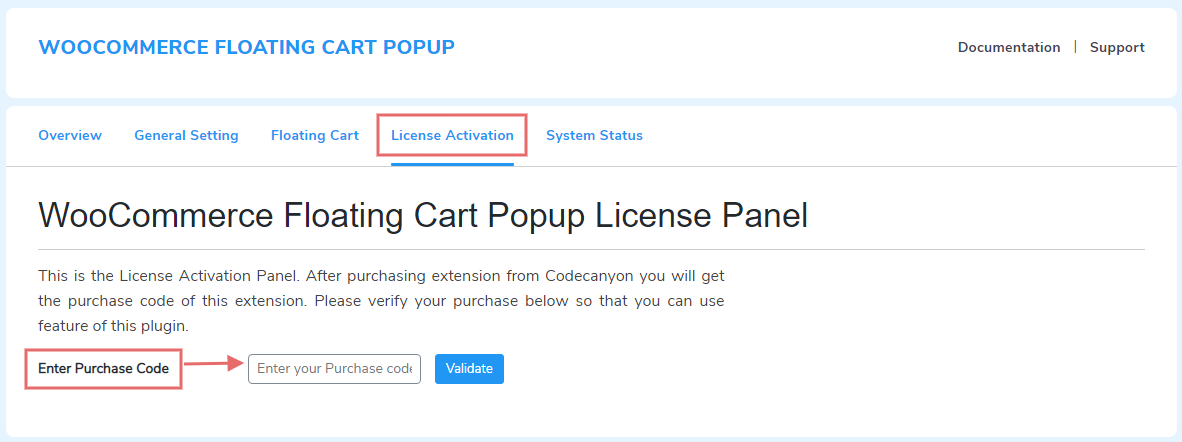
Validate the License
Validate the plugin by entering the purchase code in the “License Activation” section that you received after purchasing the plugin. Check the License Verification process for more.

Once you validate the plugin, you can continue to use the plugin without any interruption. Further, after the successful validation, the “License Activation” section will automatically disappear.
After installation and activation, it’s time to set the plugin and see the floating cart popup features in your WooCommerce store.
These settings are done under two setting menu:
- General setting
- Floating cart

Step 3. General Setting
Click on the “General Setting” menu to see all the setting options. It contains four setting options, which are:
-
Enable Plugin
Set the Toggle button to ON to enable the floating cart plugin. It immediately adds a floating cart to your store, however all with the default setting.

-
Upload Cart Image
Add a cart image of your choice in this setting. However, there is a default icon, but that’s something that may not represent your brand. So the best is, upload your own icon. It can be even a Gif, as that makes the cart icon more engaging (example can be seen in product documentation).

-
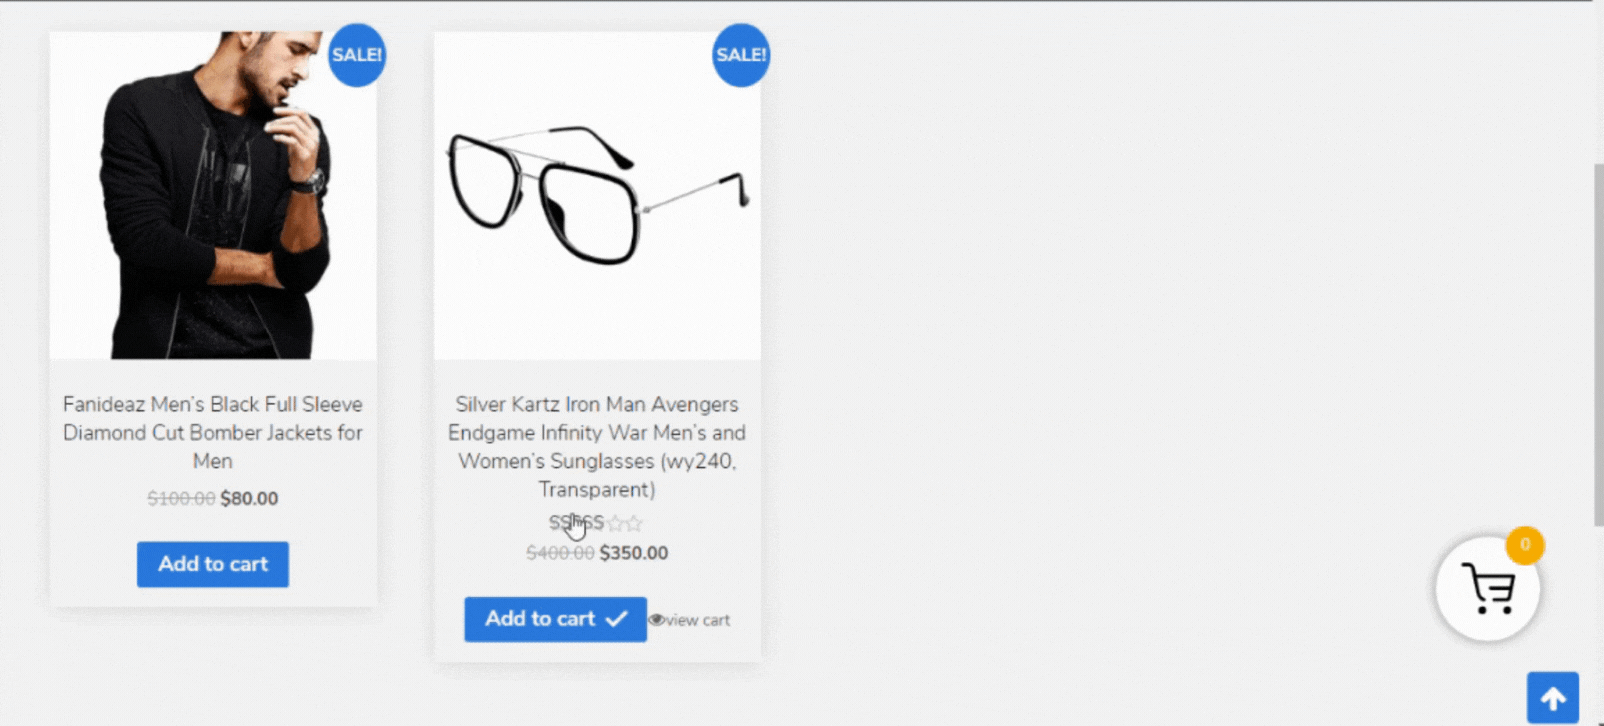
Fly to Cart Effect
This is an amazing effect that makes the overall floating cart feature visually attractive to the buyers. It displays how the product gets into the cart when the visitors click on the “Add to cart” button.

There are multiple effects that the store owners can get for their store.
- Drag (shown above)
- Zoom Out
- Rotate Clockwise
- Rotate Anti-Clockwise
- Vertical Flip
- Horizontal Flip
Simply choose the one you like from the drop-down menu. And, that’s set into action.

-
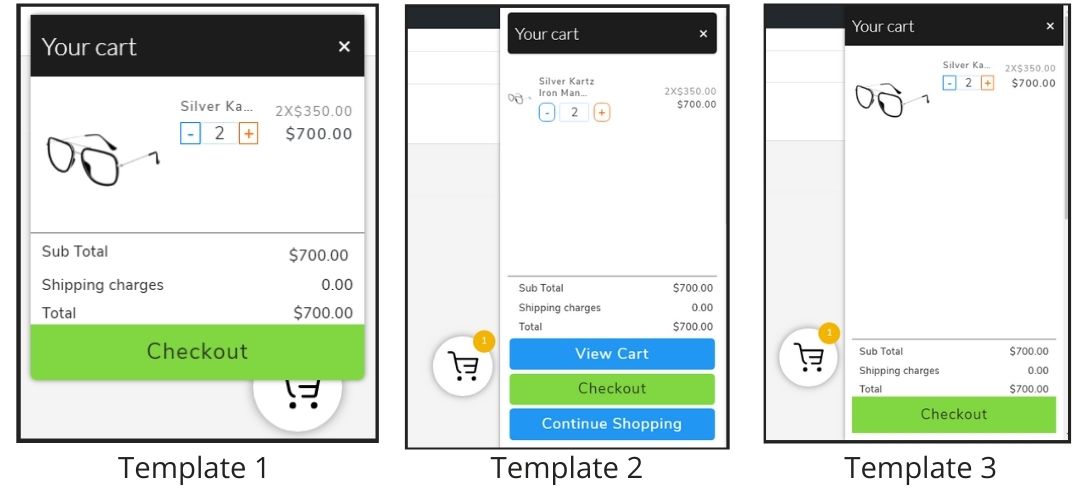
Cart Templates
The popup that contains the details of the added item of the cart can be set to a different design by selecting a different template from this option.
There are three different templates available which are:


Step 4. Floating Cart Setting
Finally, this setting lets you change the way your popup panel will look and the position. The template that you choose in the General setting, will have some aspect such as title, background color, text color, etc. All these formatting can be changed as per your brand and choice.
Apart from these design aspects, you can set the position of the cart, select the page for the floating cart, set horizontal and vertical offset, and other things. Let’s learn to set them all.
-
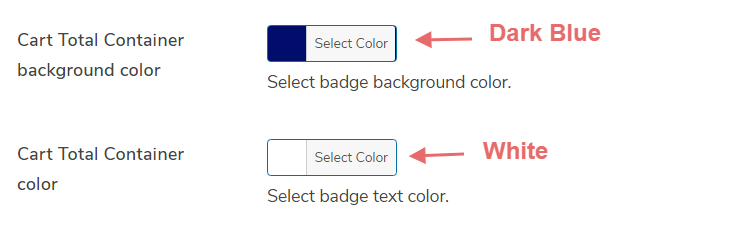
Cart Container Setting
Here you can set the way your cart container will look. Basically, a cart container is a badge on the cart that displays the total number of items present in your cart. Thus, buyers get to know about the number of added items even without clicking on it.

When you set these in the backend, your buyers will see those in the frontend as:

-
Cart Display Setting
The floating cart will show popup details either on click or on hover. You can choose from this setting option.

-
Floating Cart Position Setting
Different store owners like to place the floating cart at different places, and hence the WooCommerce floating cart popup plugin provides you the option to choose that position.
You can shift your cart either on:
- Top right of the page
- Top left of the page
- Bottom right of the page
- Bottom left of the page

-
Cart X and Y Offset
X offset lets you shift the floating cart left and right in pixels to find the most suitable position. While the Y offset lets you shift the floating cart up and down in pixels. Overall, it’s all about finding the perfect place for the floating cart so that no other aspect of the store is disturbed.
-
Select Pages for Floating Cart
It’s not convenient to display a floating cart on all the pages of your WooCommerce store. Why would someone want to see a floating cart on the privacy page, refund policy page, or even checkout page?
So, the plugin allows you to select those pages in this setting. You can choose product pages, shopping pages, offer pages, and other suitable pages where the floating cart is fit for use.

-
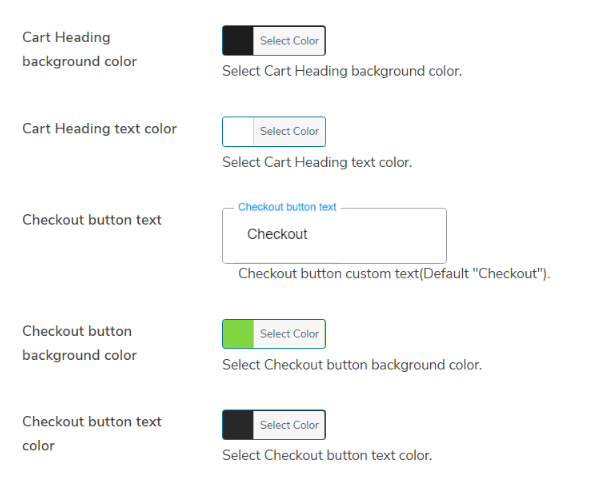
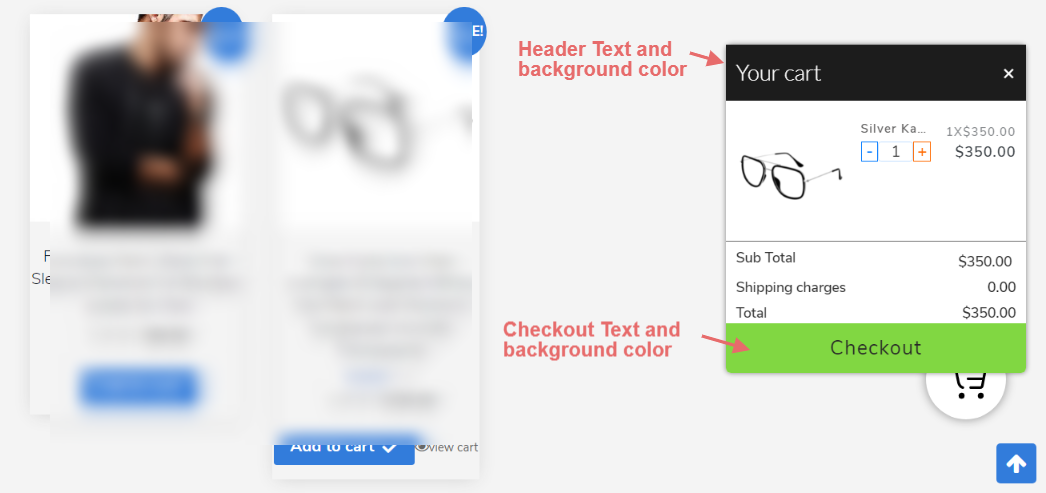
Header & Checkout Text and Background Color Setting
Admin can set the text, background color and the text color of the header and the checkout button to make it look uniform with the other design aspect of their store.

Here is the frontend:

After all these settings are done. Save the changes. And it’s DONE.
Your WooCommerce store with floating cart features is ready to engage more visitors with a quick and easily accessible floating cart.


Benefits of Adding Floating Cart
The floating cart popup that we just learned to set up on the WooCommerce store, adds some undoubtful benefits. Let’s see what are those extra benefits for store owners or customers.
Here are the benefits:
- Improve the shopping experience of the buyers.
As we already discussed, adding floating cart popup reduces lots of extra unnecessary clicks that buyers have to make when planning purchase of multiple products. It eases shopping, saves time and extra browsing. Overall, the shopping experience of the buyers improves. Buyers can immediately check all the added products.
- Helps in reducing cart abandonment.
Abandoned cart cases majorly arise either when the customer adds uncertain products or when they face difficulty in checkout. With WooCommerce floating carts, both of these major reasons are resolved, allowing buyers to easily remove items from the cart, and proceed to checkout. Hence, the cases of cart abandonment reduces.
- Check cart details anytime
Floating cart popup displays all essential details of the cart directly in the popup that opens up after click or hover. Hence, buyers need not visit the cart page to see what they have added, its shipping charges or to remove any cart. They can do all that from the floating cart popup.
- Increase the conversion rate
Floating cart popup contains the checkout button, which is far more accessible than in normal cases. This increases the chances of conversion. The easier you make the checkout process the better is the conversion rate.
Conclusion
Wasn’t the setup process easy? I find that too easy.
I have tried my best to take you with the complete setup process in the most easy and efficient way possible. The overall setup really takes no more than 5 minutes if everything goes well.
However, you may come across any random problems. For that, we are always here to help. You can go through documentation (link is already provided above). If you have any doubt regarding the working of the plugin, check the demo (link shared above) and even if there is still any problem, simply comment below. Or contact the support team, ready to help 24/7.
Thank you for reading. Good luck.
About the Author: sanjeevmaurya